New Samples for the Scrap Strategies Class

It’s been a while since I updated my Strap Strategies file, and I realized I’ve made a lot of new quilts since I set-up that tab.  So here are some fresh pix to spark your interest and some links to my blog that describe some of the  processes I go through when making these fun and easy quilts.

Blue Scraps #1- 36" x 48"

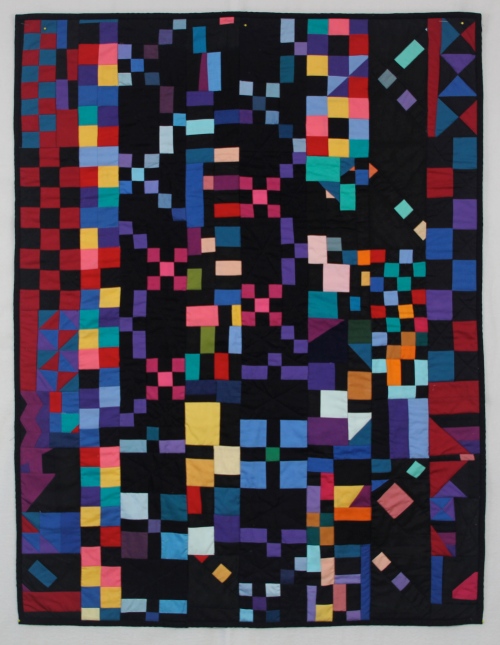
Blue Scraps #1- 36″ x 48″

Here’s a blog that show the process of Scrap Strategies from the start:

click here

Amish Scrappy leftovers #1

Amish Scrappy leftovers #1

Here’s a link that shows how I constructed this quit:

click here to see

Batik Scraps #3

Batik Scraps #3

Here’s a link to more info. about my batik series:

click here

30's Scraps #3-  48" x 48"

30’s Scraps #3- 48″ x 48″

Here’s a link to my 30’s series:

click here

30's scraps #2-  34" x 34"

30’s scraps #2- 34″ x 34″

Yarn dyed Scraps #1-  36" x 48"

Yarn dyed Scraps #1- 36″ x 48″

Here’s a link to the making of this quilt:

click here

Here’s my flannel series:

Flannel Scraps #1

Flannel Scraps #1

Flannel scraps #2-   38" x 42"

Flannel Series #2- 38″ x 42″

Flannel Scraps #3

Flannel Scraps #3- 58″ x 68″

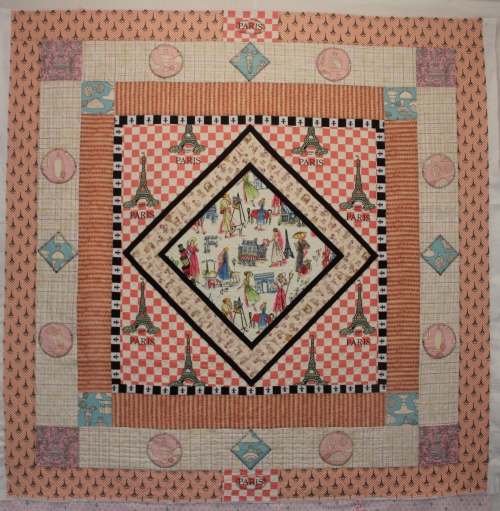
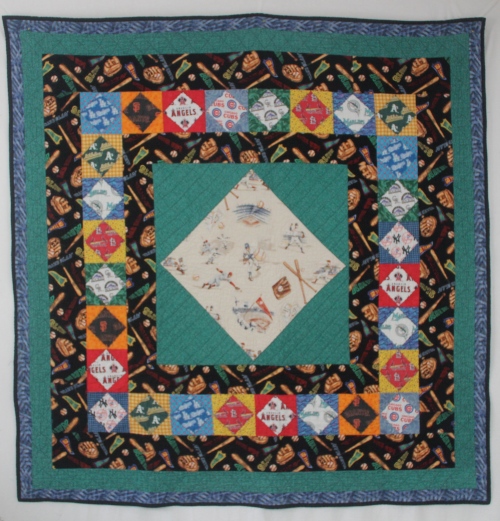
Here’s my kide fabric series:

kid fabrics #1-  48" x 48"

kid fabrics #1- 48″ x 48″

Scrappy Kid's Fabric #3

Scrappy Kid’s Fabric #3

kid fabric # 4-  48" x 48"

kid fabrics # 3- 48″ x 48″

As you can see there are a lot of styles and possibilities when you start sorting your straps!  For more pix of samples check out the Scrap Stratigeis Class tab at the top of my home page.   And for more info on my general quilt activities check out my blog at;  cspoonquilt.blogspot.com       Any specific questions you can email me at ; cspoonquilt@yahoo.com.  I hope to see you in Class!            Happy New Year!!  Cheers, Claire W.

Another Sample for my Art Quilt Class

Inspiration for small wall hangings can come from the simplest of places…Image

In this case the yellow house with the blue roof and dark sky reminded me of that song “I’m going back to my little grass shack…”,  I guess the batiks help to give it a tropical feel?!  Anyway, it got me to thinking, ‘what could I surround that little house with to create a tropical scene’?

 I remembered that I had some palm frond batik and dug that out of my batik stash and then found the grass and bark fab to make the palm tree and grass setting for my shack and with a few batiks for the borders to finish, there was my little tropical scene in no time.

Wall hangings and “Art” quilts don’t have to be arduous projects?  Just start with a fun idea, a little story that you want to tell.  Find fabrics that help illustrate or reprsent that idea in someway and then put them together in an interesting way.  That’s What my class “Let the Fabric do the Art Work’ is all about.  Check out the Art Quilt Class tab at the top of this page for more details. 

Happy Holidays! 

Cheers, Claire W.

Welcome

Welcome to my website!  Included in the tabs above are a sampling of my classes, presentations and general information about me.  I f you have any questions about my classes or programs please feel free to contact me by email = cspoonquilt@yahoo.com , or leave a comment below.  For a week to week look at my quilting activities visit my blog   = cspoonquilt.blogspot.com.  Thanks for stopping by!

Long Incubation UFO

DSCN0201

I started this project in one of the first quilting classes I ever took !  That would have been 1995 or early 1996.  I know this because it was a class that Vicki Johnson taught for our local guild not to long after she had published her book “Paint and Patches” 1995, AQS publishers.  I dug out the book  to get a fix on the date.  It reminded me again what a great Artist and Quilter she is.  Vicki has a very unique style of mixing paint, fabric, thread work and patch work together to make beautiful wallhangings!

What motivated the sudden interest to finish this project?  Our local guild’s Faire (PVQA.org) was at the end of February and the Quilt Challenge this year was to depict your favorite Sight or Tourist Atraction of the Monterey Bay Area.   I immediately thought of this little landscape which I had started sooooo many years ago.   I live in the Santa Cruz Mountains looking to the South across the Monterey Bay to the Monterey Peninsula.  It is a glorious view that I am fortunate enough to enjoy everyday (not withstanding the fog) from my back porch! The morning of Vicki’s workshop I had nothing prepared. It was suggested to bring a picture of a landscape to work with.  I had no picture so I just made a quick sketch from my back porch as a guide. Well,  the class was great, Vicki is a very good teacher, I learned a lot including how to ‘soft edge applique’.  A very handy technique I have used many many times since.  By the end of the class I had cut out and glued most of the elements to the foundation, but once it was home I did not know what to do with it.  I lay it in between some pages in a  sketch book and there it sat essentially untouched since the class.

The Challenge was the motivator but I think the ability to finish the project came from the many years in between of learning and experimenting and building the skills I needed to finish the quilt the way I saw it in my head.   Sometimes it just takes time and a long incubation…. cheers, Claire W.

Medallions

Medallions are another type of pattern that I like to fiddle around with.  They can be very simple or really complicated.  They’re not to difficult to construct once you get the hang of it, and since they can change with every border I find them more interesting to construct than row by row quilts.  I think the first medallion quilt I made was for a round robin.  Boy that’s going back and age or two! But I think what really got me going on medallion’s was a picture of a top in the Smithsonian Collection by Martha Washington.  (my reproduction pictured below)

DIGITAL CAMERA

That lead to a whole bunch more experimenting with medallion layouts.

DIGITAL CAMERA

French theme

IMG_2329

simple repros.

IMG_2509

Left overs.

IMG_2316

More French theme…

IMG_3015

Baseball…

IMG_3196

More repros…

There are probably a few more lurking around that I have not taken pictures of but that’s just what I found in my photo file.  As you can see it is a very versatile kind of layout that  I plan on exploring more as time goes on.  In fact I’ve put together a class that I think will be a lot of fun and beginner friendly too! See the tab in the header for description and materials list.   Cheers, Claire W.

More Barish Ideas

I really like Bar quilts.  You can get alot of bang for your effort when constructing bar quilts if you choose your fabrics carefully.  For example banded prints that run parallel with the selvage can be cut into wide strips cut selvage to selvage and sashed and it almost looks like vertical rows of blocks.

Floral Fabric Bars, 30″ x 43″, 2011.

Panels can be arranged in a similar fashion.

Fairy Alphabet Bars, 36″ x 54″, 2011

Another easy application is a packet of charm patches.  This was made with a packet of 40- 5″ charm squares and some sashing. All I had to do was cut the sashing and borders and sew. soooo easy! And really charming…sorry I couldn’t help myself.

You might remember this one from an earlier post.  The squares in this quilt were simply leftover end cuts, that were all the same width.

Sometimes just random strips in similar colors can make nice bar quilts.

purple bars

Pink Flannel Bar / Scraps, 43″ x 56″, 2010

These are all stash quilts.  Simple to sew, fun to make, great looking and take very little time.  They are great projects for charitable quilts  or give-aways ’cause they aren’t huge investments of time or resources.

Well July is half over but happy July anyway. cheers, Claire W.

Big Red Ranch is Almost Finished!

Image

I’ve almost finished Red #2.  I kept the quilting really simple, my Long arm version of “stitch in the ditch”, which is simply a small squigley line along the seams.  But since I was thinking I was going to give this to my mom as a lap quilt  I backed it with flannel.  That left me with the idea of using something soft for the binding.  I had some black velvet in my stash.  I thought that might be nice, black and red is always a good combo, right?   Well the black and red looked rather well together but velvet as a binding is a bit tricky.  The quilt was nice and square but with the velvet binding the edges went all wavy gravy; even tho’ I used my walking foot. I guess there is just too much slip, slide and bulk in the velvet to be-have under a presser foot. You don’t see it in the picture ’cause I plastered it to the design wall.

Image

I think I’m going to try blocking it like a sweater. Any suggestions?  cheers, CW

Back at the Red Bar Ranch…June 2012

Well before I got engrossed in Randy’s sow along (I have 45 blocks now) I was contemplating what to do with this bunch of leftover red strips.

I had this brainstorm that I could sew them together and then cut them up into 6” block units.

And make blocks like these…

That worked pretty well except that the diagonal cuts got to be a bit long.

 I know what you are thinking, that’s a lot of bias; but, I have always found that as long as you don’t yank at the edges too much all will be well (and square).

Red #2- 49″ x 49″

The blocks are a little wonky ’cause I had some problems with the long cuts.  But this method does whip up enough units to make a decent sized lap quilt in a jiffy. You may be wondering, ‘Why all the red strips?’.  Many years ago I wanted to make a quilt  for my friend Lianna.  When I asked her what kind of quilt she would like she said she did not care what style it was just that it had to be red.  This was quite a challenge for me, I had never made an all red quilt before but I figured if it was going to be one color I was going to vary the shades of that one color as much as possible, to make it more interesting.  I bought a lot of ‘reds’. Cut a lot of red strips and accumulated a lot of red strips.

Alas,  all that experimentation lead to more scraps.  But scraps are my favorite so I made YET another scrappy Bar Quilt.

I think that blue and white batik is the perfect compliment to all that crazy red.  After that there were Still more scraps so I made some misc. pillow / wall hanging type things.

Even tho’ people normally think of red as something you add to jazz things up I think when used like this It has a very calm feeling.

And even tho’ the ‘red’ basket is not empty I think I see progress ( it use to be overflowing and now it’s just full!)

Happy June, cheers, CW

Block Fever= Randy’s Sow-along- May 2012

I don’t do many ‘classical’ blocks these days.  I guess I’m just to impatient or sloppy or something.   I would describe myself as an adequate piecer, but my blocks are never perfect so I’m not inclined to take on projects that require that much attention.  Having said that;  I was over at my friend Randy’s house a couple of weeks ago and she was showing me a bunch of  6″ blocks from her Sow-along from her blog= www.Barristersblock.blogspot.com.  I thought they were so cool I thought I’d give it a try.  Well strike me down with a feather but I got bit by the bug!  I have been having so much fun making these blocks it is really like a fever!  Here’s one from Randy’s blog this week.

Of course  I had a lot of catching up to do so I have been making 3 or 4 blocks every day or so.  To mix things up, I’ll do a couple of Randy’s blocks and then I’ll choose a few of my own.  Here’s a couple I did today.

As you can see the piecing is not perfect but it will have to do.  I’m on a mission!  I have decided to make enough for a bed size quilt.  I’m thinkin’  maybe 104″ square.  I like bed quilts with a good drape on the sides.  My husband is a real ‘covers hog’  if I don’t use oversized covers  I end up in the cold.  Anywho, at 104″  that’s at least 15 x 15 = 225 blocks and that’s with  1″ sashing.  Yikes!  Well I already  have 36 blocks on account of this fever I’m in.

Hopefully it won’t subside too soon and Randy’s sow along will help to keep me in motivated.  Thanks Randy!

Cheers to all and Happy May!  Claire W.

More Quick kid Quilts

After the fun I had with the car and truck fabrics all I had left was a small pile of horizontal (selvage to selvage) all different width strips.  Not a lot of flexibility there.  But since I kinda had Bar quilts on the brain I wondered if what worked vertically might work horizontally?!  So I put this quick kid quilt together.

I had to pull a few extra strips from my stripy scrap bag ‘cause I did not have quite enough car strips to make a full top.  I think the geometric checkerboard fabrics help to calm down the busy car fabrics.  Plus  the checkerboards are reminiscent of racing flags so in an odd way they work thematically.  I added the tonal green to balance the single green car strip.  And the black with chilly peppers were the only thing I could find to balance the black-background-car fabs.

I was trying to pull from my scrappy strips as much as possible so, the right border is the last of the leftovers from the first quilt and the borders are all a little off from one another but I kinda like that; and I did not have to cut them.  I know how lazy can I be?!  Don’t answer that!

All these horizontal strips got me thinking about other related bags of leftover strips so I pulled out this bag of monochromatic red strips leftover from a really ancient project and put them up on my design wall.

I don’t think  this color scheme translates to this layout as well as the conversation prints;  but it has given me an idea for another possible solution for these strips!  That’s what design walls are for, right?!!!  I’ll keep you posted on the ‘solution’ as soon as I work out more of the details. Cheers, CW